

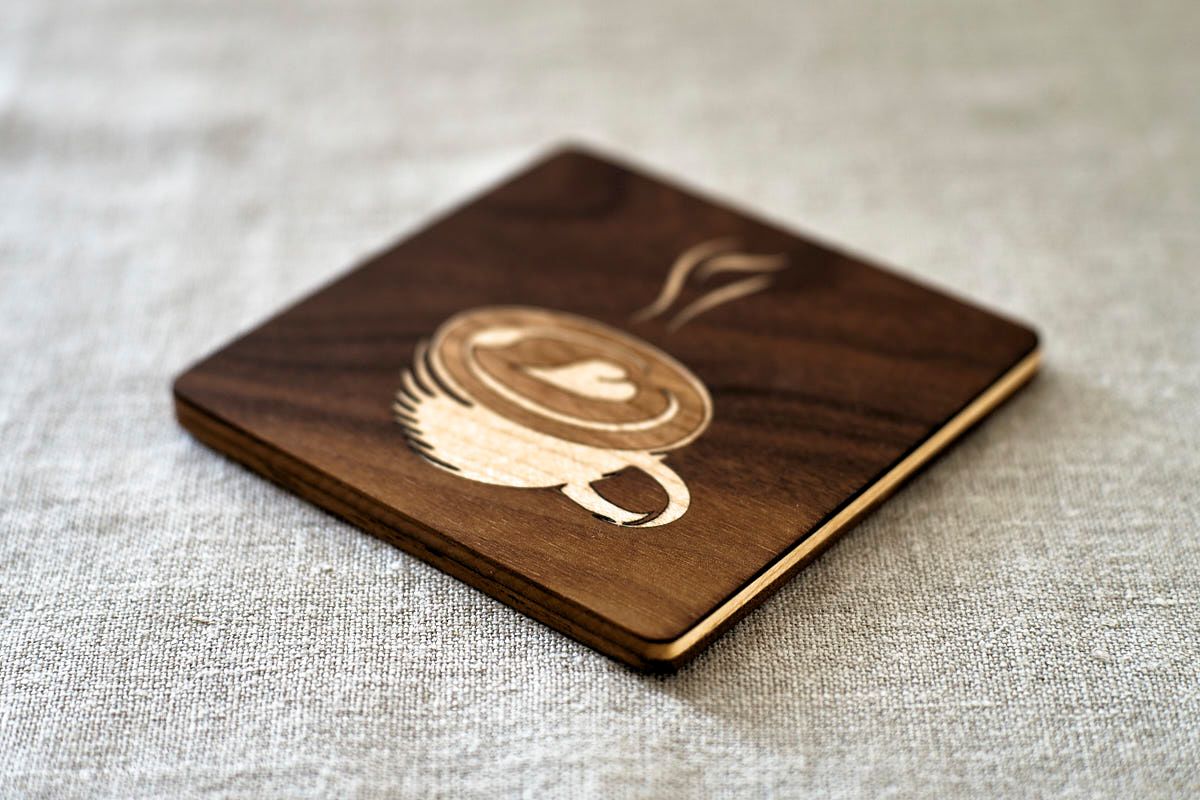
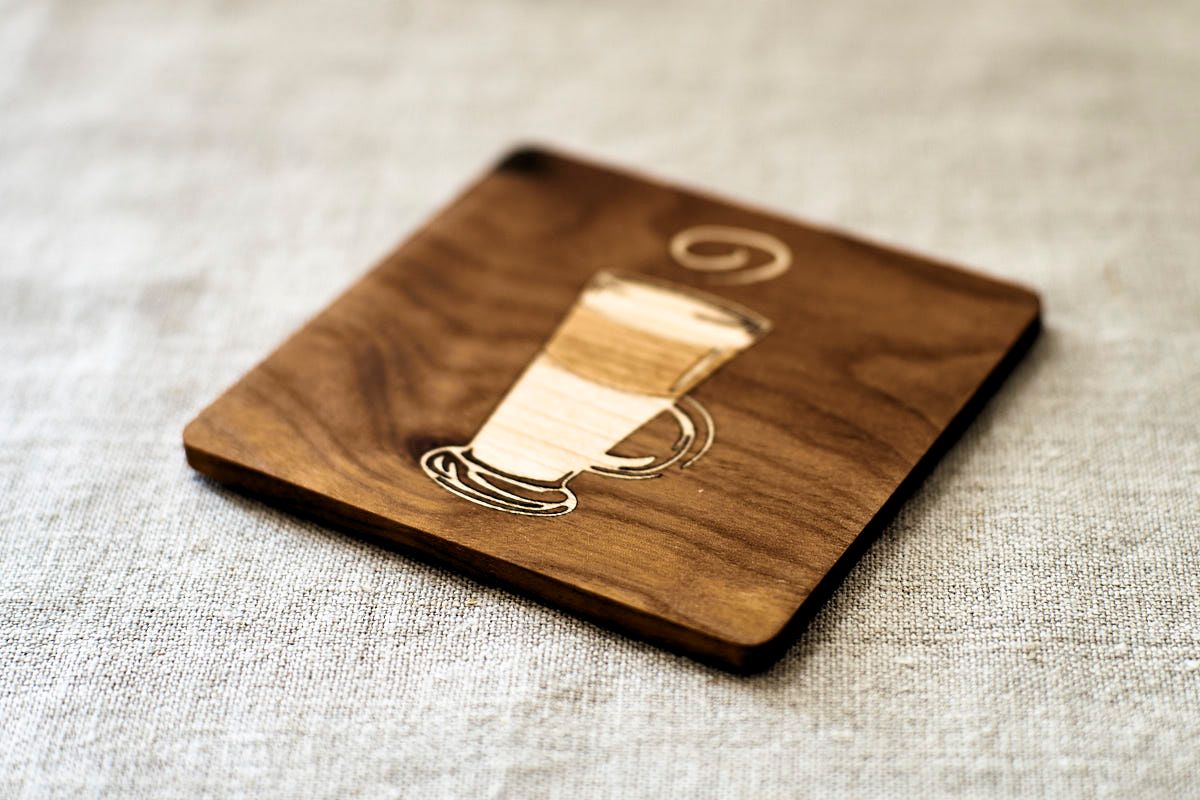
Months ago I started making coffee-design drink coasters out of walnut with maple and cherry inlays. Up to then I'd been using a CNC machine to do most of my cutting. But I tried the laser cutter and found I could make cavities and fill them with cut-out veneer pieces to make the artwork. I posted the coasters on Instagram as they were completed and oiled. I figured that they were all but finished at that point.
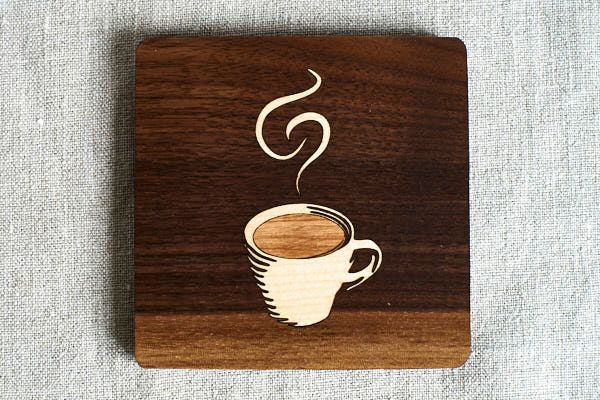
Oiled wood looks beautiful. The oil evens out surface imperfections and generates a characteristic colour for each species that I can reliably use in my designs. Unfortunately it's not water resistant. Or wine resistant. Or heat, acid, or anything much else resistant. When you make a coaster with a picture of a steaming cup of coffee on it, it's reasonable to expect people to want to put their hot coffee on top of it. And to expect them to spill some coffee on it. In fact the original idea of the coaster is for it to soak up the spill to protect the surface underneath. Bar coasters are made of paper for that reason. But again, you don't want to pay much for a paper spill-soaker and you don't expect it to last. Coasters need to either be impervious or disposable.
I don't want to make disposable things so I started looking into finishing for real. Hitherto I've occasionally slapped some water-base varnish or primer over things to keep the weather off them a bit – but not if I don't really have to. Sadly almost all of the water-base varnish I've tried absolutely kills the beautiful colour of the oiled wood. (Turns out you can apply water-base over oil - the oil just needs to be completely dry.) 1.
The best solution I've discovered so far is oil-based varnish. It keeps the colour of the underlying oil, and some varieties can warm the tones further over time. In most cases that's not a bad thing for wood. Oil-based varnish also builds a nice thick film quickly and is heat and water resistant. They make sailing ships out of it – it's that good. But tung and polyurethane varnishes take a long age of the world to fully cure. This year is going by slowly because of the lack of parties, gatherings and other anticipations. But I'm sure I made those coasters when the snows of winter covered this land. You can still get a whiff of the varnish if you get close. Especially if you're resting a hot drink on one. Not everyone likes that.
Oil-based varnishes are also harder to come by than in times gone by because even when they are made with natural resins and oils they are high in VOCs (volatile organic compounds). While that acronym covers a lot of things, including the smell of flowers and freshly cut grass, we use the term pretty exclusively to denote utter badness. Without proper respirators it can be dangerous to use these products frequently. They may be food-safe when dry but they do nasty things to you when wet. Manufacturers are therefore herding us slowly to a less beautiful but also less medically litigious world.
So the lead time on my coasters is seasons long. All well and good. I'll start making some now, I thought, so they'll be ready in the "future".
Except... some of them, sitting there unfinished, start to warp. This can happen to newly cut wood as previously buried moisture evaporates from the fresh surface faster than it does from the previously exposed one. Now you don't want your beautiful home-roasted cappuccino sitting on a wobbly coaster even if, by dint of its coating, it can weather the perfect storm. When you cut hardwood down to a 5mm (just under 1/4 inch) slice, it's not all that stable in the first place. Walnut in particular is pretty easy to bend across the grain at that depth. Hard maple is more rigid, but I love the dark walnut background - can't change that. So back to the drawing board.
Now, there is a class of engineered wood that can look really nice on the surface and also vastly improves dimensional stability: plywood. It's natural to associate plywood with modern engineering – another triumph of the industrial revolution over the instabilities of nature. And it's true that the way we make plywood veneers today is a large scale mechanical process involving super-sharp knives and protective garments. But plywood is a pretty basic idea. We know that the Romans used it to make some of their legionary shields, and there's evidence that the use of plywood goes back much further. The main difference between modern plywoods and ancient examples is the high quality of the glues that we have available now.
Plywood is great for jigs and fixtures around the workshop, but because of its modern associations it is not really a label I want to put in our product descriptions. There's more to commercially produced plywood than just veneer and glue but basically that's the plan: an odd number of thin sheets of wood glued at an angle to each other. Thin wood bends easily across the grain – but the wood fibers themselves are rigid tubes of sugar and they don't want to bend. So if you glue two thin bits at right-angles you get a thicker, flatter, more stable sheet.
As an experiment I made a plywood coaster with walnut and maple. I thought the middle maple ply would make an interesting stripe. Which it kind of does – at least on the long grain sides (lower right in the photograph). Hard maple has minimal uptake of oil on the long grain sides so it doesn't darken as much as other woods. On the end-grain though (lower left) it darkens so much that it's almost the same colour as the walnut in the other plies. Even if the maple layer was contrasting all the way around though, there's just this association of man made cheapness with plywood that I at least can't escape. Expensive shop-made plywood is still plywood no matter its historical provenance.
So then I thought, how about using the CNC to cut a shell of walnut and nest two plies inside it? That makes most of the thing plywood, gaining the stability of the layered plies, but the edges just look like a single piece of walnut. There may be some wood movement of the inner plies against the shell so I'll leave a little gap. But it will all be embedded in fancy modern wood glue and covered in a fairly thick shell of varnish, so wood movement should be minimal.
I've had a couple of theses glued up for a while and they seem to be remaining stable. Now that we have some humid weather I can see how they respond to wood movement by leaving them up or downstairs for a few weeks at a time. Another advantage of this construction technique is that I can significantly reduce the amount of time it takes to cut out the holes for the inlays. Instead of carving out a cavity in a 5mm thick piece with the laser I can just cut out the hole in a 1.5mm thick top ply. Cutting takes about a fifth of the time that carving would.
So making these coasters is a long game – which has come as quite a surprise to me. I still think they are worth pursuing, despite the complications. I'm also itching to get the process down so I can start working on some new designs for them.
I'll send out a preview to the newsletter list when we get close to offering these in the store.
1. I've found one that seems to do better at this - so more experiments to come.